Featured Post

Gallery Photos

I wanted to place all my favourite art felt in one place.... so enjoy!  Click on Gallery Photos title to see the whole lot!                 ...

Thursday, November 22, 2018

Nuno felt, wet felt hat. Tutorial

I remembered to take photos of my latest hat!  Here we go

Starting with a plastic resist, I placed fibre over the edges in all directions, using black merino for the bottom half and medium natural merino for the top. Under the black bottom half I placed some black silk chiffon with gold embroidery (from a vintage sari I had in my stash).  This fabric was placed face down next to the resist, then covered with the black merino top.

When covered with two fairly thin and even layers of merino, I added some fabric (black chiffon with gold embroidery) and some prefelt squares and some black roving and white silk.
After wetting and flipping, the over the edge fibre is folded onto the resist and the second side worked like the first.  Notice the black fabric from the first side is smoothed onto this side, so that it will run from one side of the hat to the other.

Here it is all tucked in and wet.  Now it is rolled up and worked for a while until sturdy enough to full to size in hot, soapy water.  After cutting out the resist, I take time to shrink and stretch and shrink and stretch, to make the hat round where it was flat.  Stretching involves shaping over the hat forms and head forms I have.  (and trying on my head too)
Pins are used to hold the creases until drying is completed.    You can see how the silk embroidered fabric details the brim when it is flipped up.  I cut a cool and asymmetric shape in the brim and put a few pleats there. 


Tuesday, October 16, 2018

Seamless Coat


My first attempt at making a coat all in one piece with a giant resist.  The first photo shows the resist taped to the wall behind the finished coat.  I made separate pockets, and sewed them on after fulling and drying, and the collar was made to the prefelt stage and sewed on the prefelted coat, then finished through the fulling stage as one.
 Here is the front of the coat with the right front over the left front (thin plastic keeps the sides from sticking together. You can see how it is almost too big for my table!

 Photo of the back ....
 The only thing I would do differently next time is make the sleeve longer.  I would like to have the option of cuffing the end. 

Monday, August 6, 2018


I have a new driver, and it needed a new golf club cover....  So I decided to make a felted  parrot like my sweet little Aspen (photo below)
 The golf club cover was made using a parrot shaped resist, and corriedale wool in two shades of blue and a pale pink.  The "sock" part is the left over wool, hand spun, two plied and knit to match.  The first photo shows the new cover next to the original Wood Hoods on my clubs.  The knit pattern is available for free on my other blog HERE.
The second photo gives you a look at my ancient Eeyore club cover and my cute little crocheted beaver cover (on a utility wood). The beaver pattern is my own, but I don't know how to write crochet patterns.  Sorry about that.


Sunday, March 4, 2018

Village at Sunset Art Coat

 It started with a sketch, of a large coat, that could be mounted to the wall with the fronts open to the back to display all the details in a wall mounted art coat.  It also needed to be totally wearable.

Then I set out to make lots of "pre-nuno-felt"... meaning I laid many beds of merino wool roving, covered with fine silk chiffon fabric in many bright colours, sourced from vintage saris.  I worked them until the nuno felt was partially felted, but not near hard felted or shrunk at all....  Then I cut house shapes, and roofs, and windows and doors.  The village was placed on another bed of merino in the form of a wool batt, and the sky, sunset and evening sky were all worked.  The piece was quite huge, big enough to work as the front and back of the coat, from bottom edge to neck.
 Here is a close up of a couple of the houses... after fully felting.
And some of the machine free style stitching to add details to the windows and doors.

The last photo is the completed coat (still needing the detailed top stitching).  You can see that I have added black sleeves with white stars, and just catch a bit of the collar that is black and curly locks in blue.

More photos to follow, after all the stitching is done, hopefully displayed on the wall, and displayed as fashionable wearable art.

Friday, February 16, 2018

Tracy's Coat

I have a special project to share.  My friend Tracy wanted to make a coat.  I prefer to make "yardage" out of felt, and custom tailor the coat with my sewing machine.  With my workshop space and my assistance, she started with these lovely ingredients: 
 Above you see merino rovings, vintage sari silk pieces, and a merino batt (for the base) in medium grey.
The next two photo shows the layout of the "fabric" that will become the back of the coat.  She laid out a layer of the batt, then various silk fabric pieces, and merino roving ...
 then yarns and bamboo fibre and silk fibre, all in the warm autumn colours.
 And after felting the whole piece.... here is the back of the coat.
 and a close up shot with one of the sari fabrics.
 This one is the back and the front felt pieces.
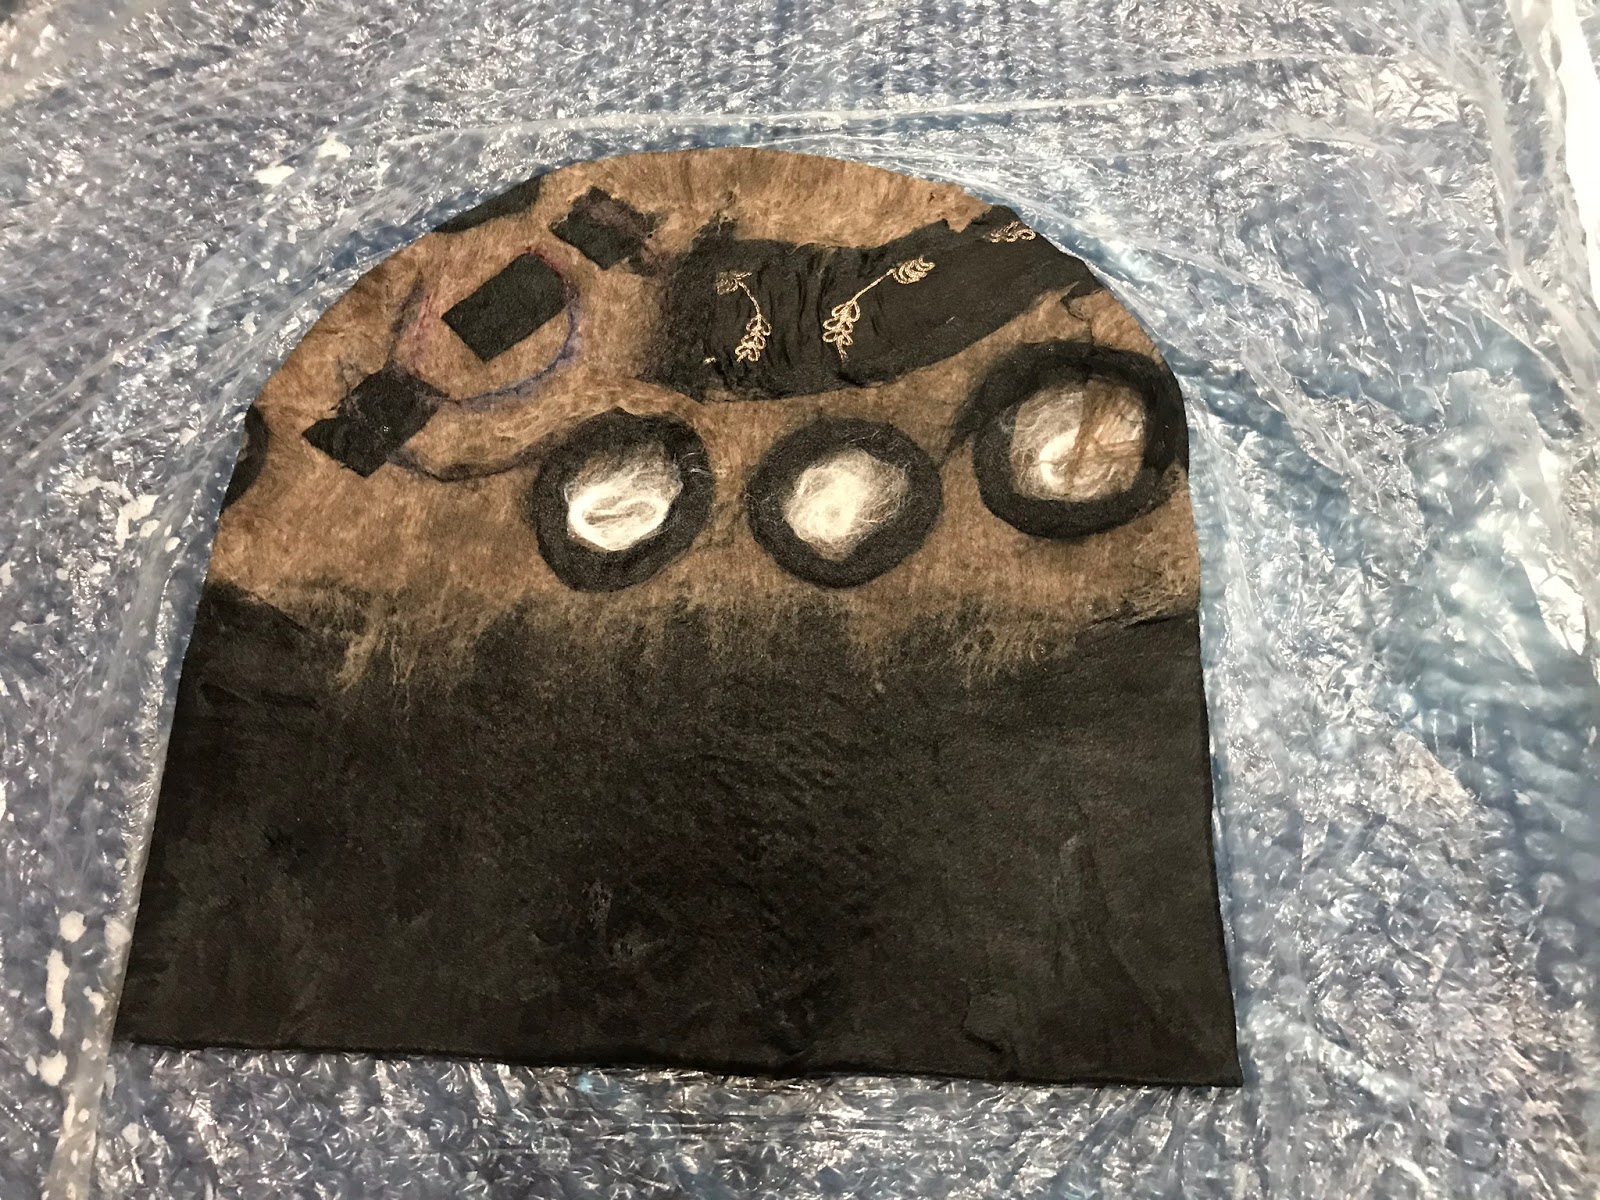
 For the third piece (the sleeves, and collar) I remembered to take a photo in the earliest stage.  The grey batt, with the start of the neutral taupe merino.  The whole thing is covered with taupe before adding the sari fabric, then the other colours and details.
 The top of the sleeve, collar piece after wetting down.
 Then we flipped it to add edging and "back of collar" colour.. (the gold).
 On the last day, after all pieces were dried and steamed with the iron, we cut the coat pattern, and sewed the seams for a perfect fit for Tracy.  Four different buttons were spaced along the front, and four secured button holes created.  The collar can be up or down, and the cuffs of the sleeves are turned up to show pattern on the underside.  Nice details.


Friday, January 12, 2018

Nuno Felt Coat - repair with sander.

I have a few photos of my latest nuno felt coat.  The first shows the thin layer of merino fibre, laid in all directions (but only one layer) over my large table.  This size will make a perfect piece for the back, then I repeat for both fronts, then a slightly smaller piece for the sleeves and collar and pockets.
I like to make yardage and tailor the coat to fit with set in sleeves, and a curved collar.
 This is the end result of the first piece, the back.  It ended up nice and thin, but alas, it had a hole in one spot.  So here are a few photos of the repair job, using a bit more merino wool, and a hand sander with polar fleece instead of sand paper, to quickly felt the hole closed.  A quick rinse and rub with hot then cold water has it repaired! 


 And the finished coat.  Nice and light... the whole thing weighs just 320 grams, and it warm enough for mild winter days or spring and fall.  The surface has silk chiffon from three different vintage saris, laid over the merino base, with yarn and rayon and hemp fibres to add more detail.
 I add an extra piece of felt to the sewn button holes to make them extra sturdy and reduce stretching of the button hole. 

 I just love the crinkly texture and the shimmer of the fibres.
Custom order one for yourself on my Etsy site, or shop in person at Pamela's in Jordan Village (Niagara Region, Ontario, Canada)